Friday, November 28, 2014

Thanksgiving 2014


I know it is tradition to have Turkey and mashed potatoes for Thanksgiving dinner.  But to be honest that isn’t a meal that goes over well with my crowd.  Most of them don’t even like pumpkin pie.  And way back in the day before we had kids Deric and I didn’t know how to cook too many things and looked far away from our families.  So we used to make lasagna for Thanksgiving.  Sure friends would invite us over for turkey, but it is those quiet dinners just the two of us cooking and eating lasagna that I remember most fondly.


One year when our oldest was old enough to go to school, but young enough to still be brainwashed by the things they told her she decided we needed to have a more traditional feast.  “But mom we gotta have turkey for Thanksgiving.”  And, thus, we went down the traditional Thanksgiving dinner road. 


Fast forward a dozen or so years later and we find ourselves living closer to family.  Our presence is required by multiple sides for every holiday.  After 20 years of living far away, I find the number of times we have to make a big production from November to January utterly exhausting.  Longing for those simpler days of traditional Thanksgiving lasagna, I started thinking about the idea of a Thanksgiving meal.  My oldest, who years ago insisted on a traditional dinner, now doesn’t eat any of it but the rolls.  There is no consensus on the side dishes so we end up making many different dishes that go half eaten and eventually get thrown out.


Feeling as if all that cooking is for nothing on my day off, I decided it’s time for a new chapter.  Thanksgiving dinner will never be the simple affair it was back when it was just the two of us, but at least we can all have something we like.   


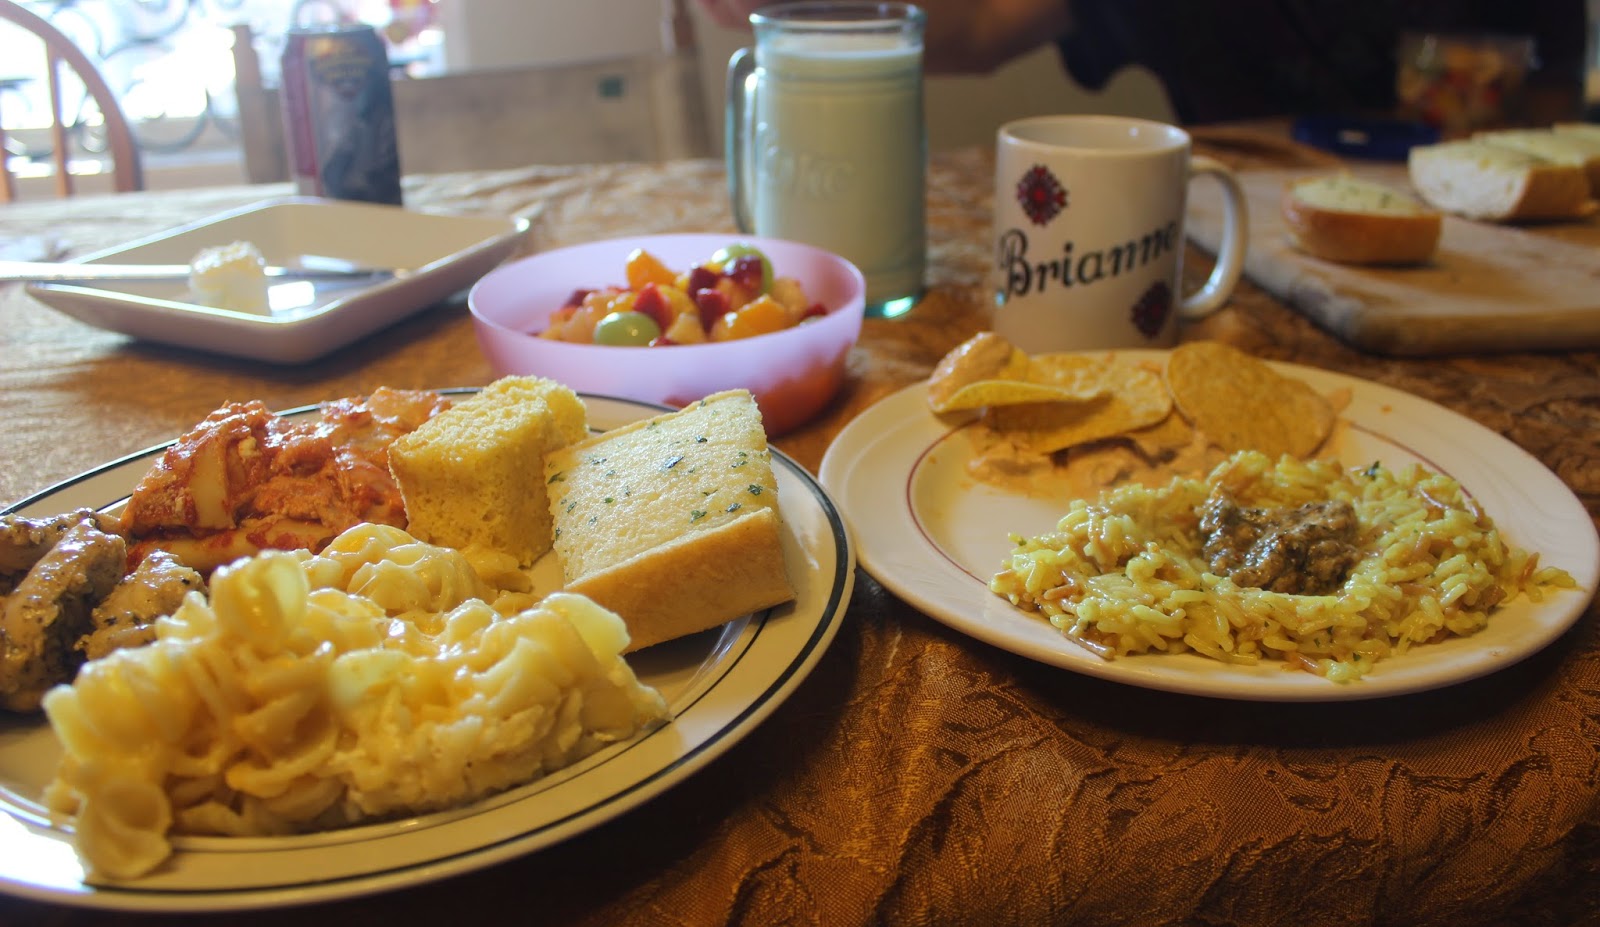
So this year I asked each of my children (ages 8-16) to make their favorite dish, or at one they wanted to eat.  No traditional Thanksgiving food was chosen.  But we are going eat well!  I am making lasagna and garlic bread…..


Friday, April 4, 2014

$200 Laundry Room Makeover


My laundry room was just an unfinished space in the basement with no organization and no place to sort or fold laundry.  The utility sink was broken and useless.  I've been whining about it for the last year and a half since moving into this house.


 Here's my pool table which has become the dumping ground for all clean laundry.  It's not piled too high in this picture.  It gets much worse!  But folded or unfolded no one can play pool.


So over the last two days the hubby and I gave the laundry room a makeover. 


We had put up one panel behind the washer a couple of weeks ago.  The goal here was to block off the storage area under the stairs.    Things were always falling back there and getting lost forever.  So we started by finishing that project.  I left the walls behind the washer and dryer (and the ceiling you can't see) unfinished because we have very little unfinished space which limits our access to plumbing and electrical.  

Did you see my paint bucket still sitting next to the washer?  I use it to set hampers on while I sort laundry.  The kids use it to stand on so they can reach the controls and the bottom of the washer.  I could have replaced it with a cute step stool.  But why?  It's the perfect height, works great, and costs nothing.


Notice this isn't a cabinet, but a base built from 2x4s.  These were used as support while building the garage, but aren't needed now.  I left it open so I could make a sorting center under the cabinet.  The baskets below the counter are labeled for dirty laundry.  The ones on the shelves have the names of people for their clean laundry.

I tried to reuse and salvage as many things as I could and keep my expenses low.  So here is the run down on what I used and what I spent:

  • Paneling for the wall and back of sink base: new $45
  • Counter top:  bought at auction, $1
  • Deep cast iron sink:  salvaged from my serial killer shed (full of stuff left by the previous owner), FREE
  • 2x4 base:  recycled from garage project, FREE
  • Fabric at end of cabinet:  old curtain from a previous house, FREE
  • Plumbing:  new, $30
  • Faucet:  I had a used one that I tried to install.  But it was broken and leaked.  So this was one of my biggest expenses at, $62
  • Shelving for clean laundry:  recycled from another project, FREE
  • Brackets for shelves:  new, $12
  • Laundry baskets:  I used a bunch I had, but I needed more, $45
  • Trash can:  paper bag from the grocery store, FREE (and easy to throw out and replace!)
  • Paint bucket step stool:  left in the house by previous owner, FREE
  • Bar for hanging clothes:  Old shower curtain rod left in the house and strung up with clothes line wire left by the previous owner, FREE
  • Signs for laundry baskets:  wood flooring salvaged from a dumpster, paint I already had, and attached with twine from hay bales my horses ate, FREE

Now let's see what it looks like next week!

Sunday, March 30, 2014

Homemade Playset 1 Year Later

Okay, so it hasn't been a WHOLE year, but almost a year since we built our son a swing set out of some stuff we had around the house.  I'm happy to say that what we built then is still there and holding up fine.  You can see it here.


Since then we have added a couple of things.  In January we added a "platform."  It's not a tree house as there is no house.  And it's not a fort because it doesn't have walls.  Eventually it's meant to have a slide coming off of it.  Last time the hubby and I did the build together.  This time my youngest son helped with the build. 


We bolted some 2x4s to either side of two trees and then screwed these 2x4s onto the the top.  Yep, that's it. 

And even without the slide, my boys love it.


A few weeks later we added a "ladder."  It's really just a limb that broke off in a storm.  I cut it into 18" lengths, drilled holes and bolted them into the tree.  The hubby found a yellow handle we had from our old commercial swing set at our other house.  So we added that and now they have no problem going up and down.


Today, we added a "fort."  I had a 10' long pallet sitting in the yard and needed to get it cleaned up.  So I decided to flip it on it's side, modify it a bit and then "camouflaged" it to make a fort.  I just used some twine and tied it to the tree.

First I cut it to a shorter length that fit better and got rid of some severly damaged wood.  Then I moved some slats to make a door way.  Here you can see the green twine tying it to the tree (all it needs to stand up) and the back of the pallet which I did nothing to.  I can't see it from the house and there are no neighbors looking at it, so I think it's just fine.


After that the youngest and I spray painted it with "hammered" brown spray paint.  It really ends up looking more gray than brown and is the only thing I bought for this project this year.  And finally we "camouflaged" it with tree bark we had from our wood splitting pile.  That was harder than it seemed.  I had staples at first, but they weren't long enough for all the bark.  Then I had to find nails that were long enough, but not too long.  And on some pieces of bark that split the wood and it fell off.  Eventually we got the right combination of everything and these pieces stuck.  It seems a bit haphazard, but I let the youngest decide where it should go and help me put it on.  It is his fort after all.  And if the bark falls off again, we'll just stick some more on.  And from the house you probably wouldn't notice it or even know it was there.


While we were finishing the fort, the hubby showed up with some more PVC scraps to add to the ball drop.  He had no idea how to attach it, but I found an old cargo strap and we lashed it to the tree.  JT even decided it needed a booby trap.  So if you step up to the steering wheel you step on a special piece of bark, set off the trap, and he drops the ball at you.  Most of the time the ball follows right through all the tubes, but sometimes it doesn't and that causes the giggles.


Bet best of all, when we were done, JT said, "I don't have to go in do I?"

Saturday, March 29, 2014

First Dip in the Pool--Why do I let them talk me into such craziness?


I don't know why I let them talk me into this craziness.  Okay, so if you know me better than that, you know it wasn't so hard to talk me into it. 

It was only about 60 outside and the surface temperature of the water was 53.  I promise it was not that warm down in the depths.  But here's how the craziness played out:  Jeremy says, "It's a good day for a swim."  I respond with, "I will if you will."  Holy crap are we crazy!

But not so crazy we don't recruit a photographer and see if my ND Girl wants to join in.  How could she not!  And then the 7 year old, JT, decides to join in too.  The hubby is recruited as photographer and we are set.  (BTW, Wes stood on the deck, two stories up, laughing at us.)

We decide JT could go first since he wasn't really jumping and wouldn't really swim.  He is a brave kid and even brought out a boat to play with.  Of course once he got his feet all the way in, he ran back out fast!


When we were all done he was mad that we didn't play longer.  I couldn't help but laugh.


So then we were ready!  We were set!  And Jeremy says, "I wanted to do it by myself first."  Followed by ND Girl saying, "YOU do NOT get to be the first one to swim in the pool."  I swear it isn't that I just chickened out at first.  They both desperately wanted to be the first to swim in the pool, so I let them.


But don't tell them, Lexi was first a long time ago and I think she was happy to have someone to swim with today.


After seeing the cold reaction of the kids I was perfectly happy to chicken out, but ND Girl was having none of that after I talked her into it.  So she went with me again.  Yep, she is a crazy one.


I really did it!  And it was FREAKING COLD!   


OH  MY GOD was it FREAKING COLD!

Did I mention it was cold?

Of course Jeremy was not to be outdone by his sister.  That can't happen.  So he jumped again too!


After cold plunging the air temperature felt much warmer.  So warm in fact the puppies played


and ND Girl relaxed with her feet in the pool.


Tell me again why I let them talk me into it!


Monday, February 10, 2014

Meshing Digital and Traditional Scrapbooks


In 2008 we took a family vacation to Florida.  When we got home I started a scrapbook.  The traditional 12x12 album with paper and stickers and pictures that I had printed.  As happens to many of us, I got derailed and didn't finish the album.  Fast forward to today I have discovered digital scrapbooking. 

So how do I finish this Florida album?  I have all of the pictures digital (I even backed them up on CD at the time).  I had about 20 pages done.  That's no small amount to redo or small expense in a new book.  Twelve x twelve pages are too large to scan on most home scanners.  I decided the solution was to create new pages and have them printed out.  But where to get 12x12 prints?

I bet you know what I did next!  That's right.  I visited my friend Google and came up with a few places.  Then, I found this great blog about how to have your digital pages printed, Scrapping with Liz, Printing Digital Scrapbook Pages.  She suggested Persnickety Prints for individual pages.  I tried them out and LOVED (how do I put a little heart in for the O?) the quality of the prints. Plus they were only $1.99 per page.  In her blog, Liz mentioned printing with a white border around your pages.  I tried that too, but I don't think it mattered if I was adding it to an existing album.


So in just a few days I went from a partially done album to a complete printed album and something strange happened.  I loved looking at the pages online too.  Then I started wondering how I would get my already done pictures onto the computer.  Well, that was easy too.  Once again my friend Google lead me to a blog that said, "Take a picture of your pages."  Palm of hand to face!  Doh!


This was a little trickier than I expected , but I set up a "photo studio" with lighting and angled everything just right so there would be no glare.  For the most part it turned out pretty great.  And now I have an amazing vacation album both digital and printed.  Here is a slide show I made of a few of the pages.


Tuesday, February 4, 2014

Making your own Embellishments for Digital Scrapbooking

Finding free embellishments can take time and sometimes you don't find what you are looking for.  But you may have a great picture and think, 'Without the background this would look amazing on my page.'  That's what happened to me.  I know I can cut out backgrounds in Photo Shop, but I haven't installed it on my new computer.  Plus I know it's more complicated than what most people want to do.

Sooooo.....since I didn't want to get off the couch and find my Photoshop CDs I went with my default mode:  Google Search!  Low and behold I found out that a background removal tool was added MS Word 2010 and I had that on my computer! 

You can download a FREE version, Office 2010 Starter.  This is what I have.  It comes with Word and Excel with reduced functionality, but it has the background remover tool!  Woohoo!  This means you have free access to a tool to make your own free embellishments for your digital scrapbook.  Don't you just love the word free?  I can't tell you how excited I was!!!!!  Just Google it and you'll find a download available

Now you think I'm going to tell you how to use this wonderful tool.  I'm not.  Instead, here's a video that is a great tutorial:  https://www.youtube.com/watch?v=qRjyEBIrDyQ.  Watch, learn, and enjoy.

Now that you know how to remove the background, what do you do with the picture?  How do you get it into the scrapbook?  First, you need to save it as a PNG file.  This type of file saves the background as "see through;" no color, no white, etc.  I looked for a video tutorial and couldn't find one, but here is the step by step process.

1.  Right click on the image (after the background is removed).
2.  Choose "Save Picture As" (yep, that's my crazy cat, Snuggles)
3. Choose the location you want to save the file and give it a name.
4. Click the arrow on the right side of the "Save as type" box and choose Portable Network Graphics.
5.  Click "Save" and you are done

Now the picture without a background can be imported into whatever scrapbooking software you use.  Since that depends on your software, I'm going to trust you know how to add embellishments and pictures to your software.  Just be sure you remembered where you saved the file so you can find it again!


Here is a page where I used this technique to crop out my son.

Before:

After:

I had a great picture of a creepy statue from Six Flags Fright Night,

so I cropped out the background:

and added it to the page.

For this page I cropped out the people and and a snake head.  Then made a "scene" from them.  I used embellishments from Carena's Designs Old Wild West Sampler Freebie.  (Oh yeah, free again!)  Then added some great snake pictures my son took across the bottom.


Here are some of the embellishments I've made from pictures I took of my ornaments


and then used on this page of my family decorating the tree.


As an aside, the background on this page is a picture I took out of focus of my friends Christmas tree.  Thanks, Kellie!

This is just me playing around.  I cropped out my son doing a force push in his Halloween costume and made him float over the beach.  Honestly, this is what I did when I was learning to use this technique.  May the force be with you as you scrap!

Monday, February 3, 2014

Discovering Digital Scrapbooking

I love to scrapbook.  I've been doing it for years, but quite frankly I find it tedious to pull out all the stuff, cut papers, trim pictures, and generally make a big mess.  A couple of years ago I put my vacation pictures into an album from Snapfish.  I did all of that in the mornings while I was still on vacation.  (My family likes to sleep in and I'm a morning person.)  I was so excited to have it done by the time we got home and it was printed out and in my hands in about a week.

However, there weren't very many options for the album.  I couldn't even add text without creating a "picture of a text" in MS Publisher.  No stickers, limited backgrounds, and no free moving pictures.  I was sort of frustrated with it at that point and didn't hurry back.

A year or so later I saw a friend's album from Shutterfly and it was very robust.  I loved it.  But I was busy and didn't really do anything with it. 

A year and a half ago we moved from North Dakota to Missouri and I had to pack up all my scrapbooks and supplies.  In the new house I don't really have a place to keep them, but I was determined to get back on the scrapbooking wagon.  So I went to a crop at the local store and met a couple of nice ladies.  Worked on a few pages and discovered everyone around here is really into paper piecing.  Arrgghhh.  That is too much detail work for me.  And while the pages are beautiful (gorgeous and fantastic), I feel like the pages become more about the scrapbook and less about the photos and memories.  I generally like simple pages that highlight my photos and help tell my stories.

I once again stalled out on my scrapbooking adventure.  Then about 6 weeks ago I decided I was going to get my 2013 album completed.  But as I was thinking about it I was remembering my friends beautiful digital scrapbook.  And I decided I wanted to give it another try.  So I did what I do whenever I start something new.  I Googled it.

I started looking at options.  Online software vs. software I could buy and have on my computer.  Deciding spending no money was the right way to try it out I limited myself to online software.  The reviews said MixBook and Shutterfly had the most options and were the "best price for the money."

I ended up choosing MixBook and it was exceptionally simple to use with many themes and choices.  I did my whole 2013 album in a few weeks,  300+ pages.  Some I used their layouts, some I modiefied their layouts, and some I did my own from scratch.  Which is pretty much the way I paper scrapbook too.

Things I liked:  I could add my own backgrounds and embellishments.  I wasn't limited to what they offered and didn't have to pay to use their "extras."  There were lots of premade options including lots of blank layouts for adding my own embellishments.  I can use my own pictures as backgrounds and fade them out. The software is easy to use and understand.

Things I didn't like:  I can't round the edges of my pictures.  I may get creative to figure this out in the future but there was no easy way to do it.

Later I tried Shutterfly, but found it much less intuitive.  And while it had a few more options (not many really) I found it harder to learn and use, so I gave up pretty quickly.

Here are some of the pictures I made with Mixbook:


This is a pre-made layout from MixBook.  I just popped in the two pictures and added in the text for the dog's name.  Super easy and done!


This is a pre-made page that I modified.  There was only two pictures at the bottom and they stopped where the big picture stopped.  I modified the pictures across the bottom and added the small picture inside the other picture.  I will also give photo credit to my SIL here.  She took a couple of these pictures.


This is my own layout.  I faded one of my own pictures into the background and added the others on top.  Because the page is so busy and I didn't want to take away from the background picture I didn't add any embellishments.


This page is from a free kit I downloaded for free from DigiDesign Resort.  I then uploaded a few of their pieces to MixBook and plugged in my pictures. Their are many many embellishments and kits available online.  If you're clever you can find many free ones.  I haven't paid for any yet.  But even if you do buy them the best part is you can use them over and over and over unlike with paper scrapbooking.

I have tried (successfully and unsuccessfully) a few other things and will share those in the future.  Happy scrapbooking!

Monday, January 27, 2014

The South Side of Table Rock Lake

As we drove around leaf peeping we found ourselves on the south side of Table Rock Lake, Mo.

 We wandered:


 A bit off the beaten path....


And saw the most gorgeous colors:


And finally headed back to the other side across the Hwy 86 bridge: